Over the years, I’ve published multiple articles about testing a server restore at a client site. The idea is to confirm that if the server went down, I could quickly restore to one of the customer’s computer as a temporary solution while the server is repaired or replaced. Previous tests are blogged in 2011, 2012, 2013, 2014, 2015, 2016, 2017 (which includes 2018), 2020 (which tested Veeam restore instead of Windows server backup), and 2021 (back on Windows backup).
First, a note about off-site vs. on-site work. I was able to do the restore working remotely, but when it came to shutting down the live server and booting the test server, I was glad I was on site. It might be possible to do that remotely as well if you change the IP of the AMT/vPro on the live server; otherwise, that IP will conflict with the IP you’re trying to give the test server. Or… maybe in the router, I could disable the switch port going to the live server to “virtually” disconnect it. In any case, give some thought to avoiding an IP conflict.
This year, I wanted to try something different, and hopefully simpler: restoring the physical server to a virtual machine. The server is backed up using Synology Active Backup for Business. I have a spare Windows 10 machine running Hyper-V. Easy, right?
Well not at first. Long story short, Synology Active Backup, while it supports Hyper-V, does not support it on Windows 10. I wasted quite a bit of time getting that figured out. See today’s update at the bottom of Allow Synology Active Backup for Business to Access Hyper-V.
So instead I manually created a virtual machine with appropriately-sized disks, booted from the Active Backup bare metal restore media. Creating that media is not trivial since you have to install the Windows Assessment and Deployment Kit (ADK) and run the Active Backup for Business Recovery Media Creator. Fortunately I’d done that earlier so I already had the restore ISO on hand. See the instructions here.
The nice thing is that running a Hyper-V guest, connecting directly to the NAS, there is no messing around with Bitlocker, no USB vs. DVD confusion, and no issues with missing network drivers.
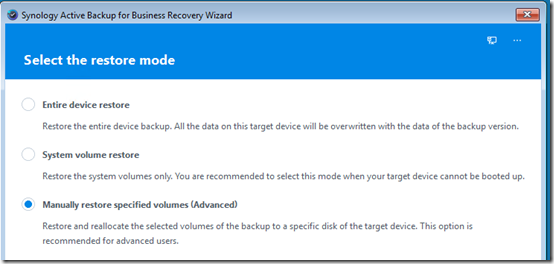
When the bare metal restore wizard starts, it asks you for the IP address and credentials for the Synology NAS and which machine you want to restore. Here are some screen shots of the rest of the restore process:
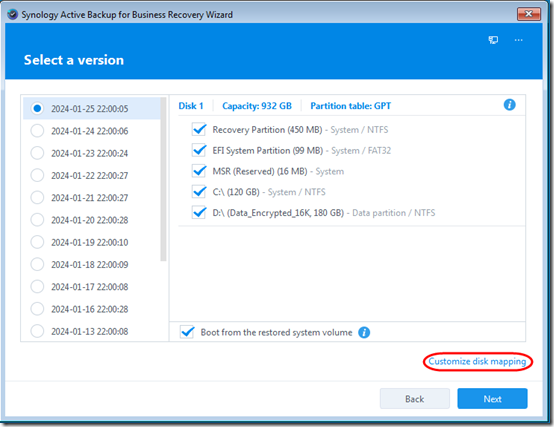
Choose which backup and which partitions to restore. I chose to Customize disk mapping:
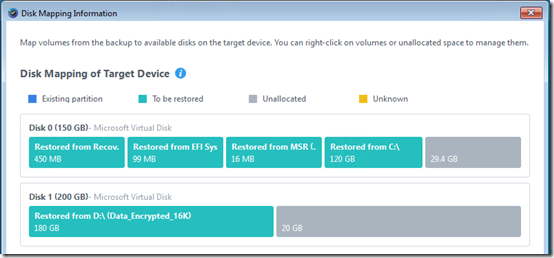
I had created two Hyper-V VHDX files, one the system drive and one for the data drive—even though those are both on the physical disk in the source server. The default mapping was pretty smart and put as much as would fit on the first VHDX and the data on the second VHDX.
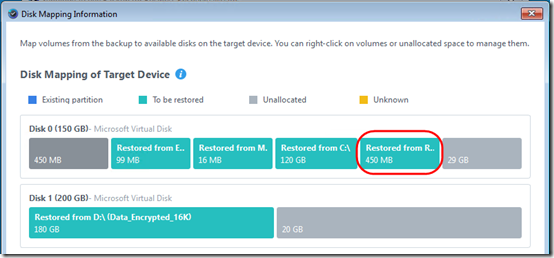
I was curious whether I could move the Recovery Volume after the OS in case I wanted to expand it later. Yep, pretty easy with a right-click to remove it from the first position and another right-click to insert it at the end:
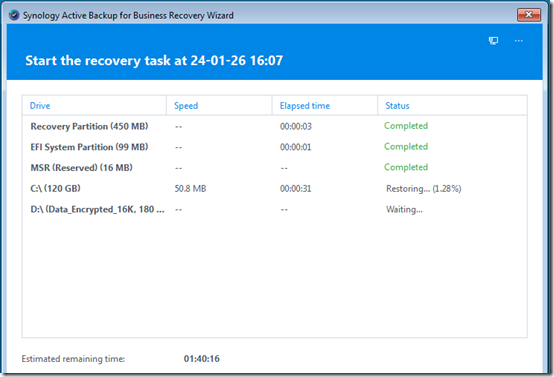
Another click or two and the restore begins:
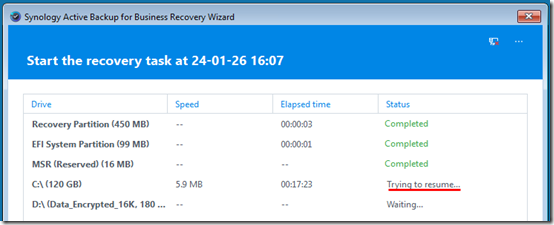
One concern I have is whether the virtual machine will boot automatically when the restore finishes. That would not be good because the real server is still online, so we’d have a name collision. I thought I’d be clever, keeping the server from going on the network by disabling the virtual machine’s NIC. Oops! That also stopped the restore. The wizard tried to handle it gracefully, wanting to resume, but I cancelled and restarted before I realized what the problem was.
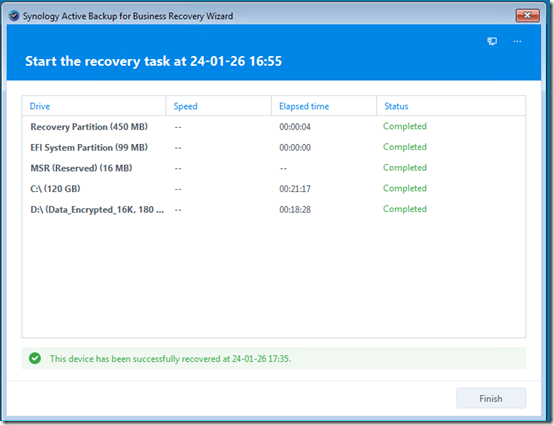
After restarting the backup and letting it run, it completed but did not automatically start the computer;
When I clicked Finish, it politely asked if I’d like to restart or turn off the machine:

After the Restore
The rest of the steps are basically the same as every year. I’ll copy them in from 2021 and make a edit with a couple 2024 notes. And a note to self: read this carefully to avoid the same issues that arise every time!
Disable Live Server and Boot Test Server
We need to get the temporary server to have the same IP address as the live server. This year, rather than mess around with re-assigning DHCP reservations in the router, I decided to just shut down the old server and change the static IP in the temporary server, now a Hyper-V guest.
1. Shut down the live server, or, if on site (and what I wound up doing this year), just unplug its network cable. Disabling the switch port in the router might also work.
2. Boot the restored Hyper-V guest. The first boot takes a while as Windows re-assigns hardware etc.
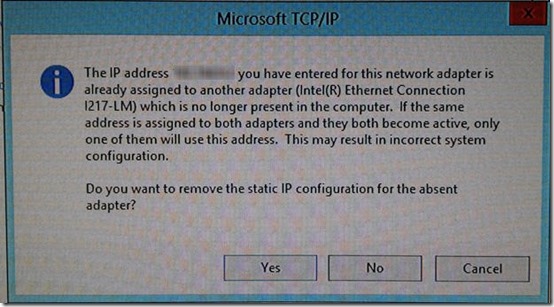
3. Log on, right-click on the network icon in the System Tray, click Open Network and Sharing Center, then Change adapter settings (or Start > ncpa.cpl.) Assign the same static IPv4 address as was used by the live server. As a domain controller, the sole DNS entry should also be the local static IP. A message appears that another adapter which is no longer present in the computer has that address. Click Yes to remove he static IP configuration for the absent adapter.
Important For some reason, removing the static IP of the absent adapter removes the gateway configuration. Go back in and make sure that a gateway is defined, pointing to the router. You may need to re-check the gateway after a reboot.
4. Reboot the system. This should go more quickly as the system is now happy to have all its drives back and its network card properly configured.
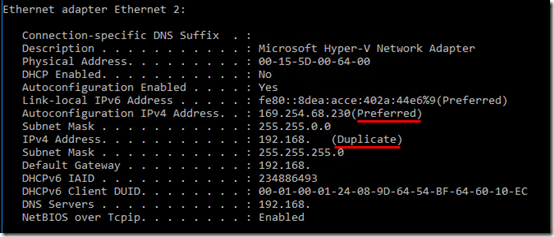
This year, I initially had left the live server shut down but the network cable connected. This left its out-of-band AMT (vPro) management online, so the test server was not successfully assigning the static IP—it showed as “duplicate” and was not passing traffic (no Internet):
Once I unplugged the network cable on the live server, the test machine set the static IP as Preferred and was back online.
Test the System
1. Check Event Viewer > Administrative Events.
2. Check that the web server works. (May need to test from outside network using a remote connection to another site.)
3. Check that Active directory works, including accepting a logon from a client and updating group policy (gpupdate).
4. Check that shared drives are available from a client. Try opening files on a network share.
5. Print a page to a network printer shared via the server.
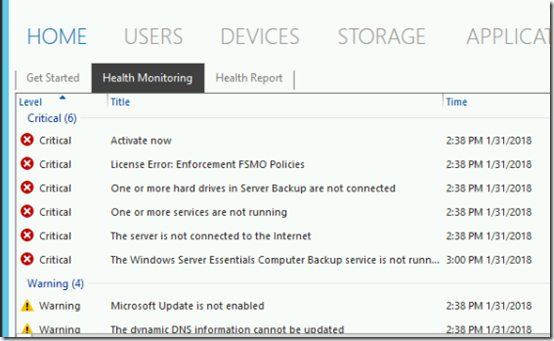
6. If you’re running the Essentials edition, review the Critical Errors in the Essentials dashboard. You may initially see several errors including licensing errors:
Under Health Monitoring Tasks, choose Refresh. Most of the errors should go away. The remaining errors indicate that some hard drives are not connected and that the Client Computer Backup service is not running. These errors are expected.
7. Also for Essentials, under Home > Health Report, choose Generate a Health Report. Review the report. This also sends an email, testing outbound email flow.
At this point, I encountered something I’d hit in 2020: the Windows Server Essentials Management service would not start. Again, following a comment in this thread, I ran wbadmin delete catalog at an Administrative command and I was able to start the Windows Server Essentials Management service, which allowed me to generate and send health reports.
8. In Computer Properties, check that Windows shows as activated.
Testing is now complete. In a true disaster recovery scenario, users could resume work now.
Re-Activate the Live Server
1. Shut down the test server running as a Hyper-V guest.
2. Plug the network cable back in to the live server.

